
Overview
Follow these instructions to add your Gmail Alias address to Front. An alias is an additional email address associated with a primary Gmail account. When an email is sent to the alias address, it will show up in the inbox of the primary Gmail account.
Prerequisites
Only add the alias to Front if you need to reply using the alias address.
The primary Gmail account associated with the alias will need to be added in Front prior to adding the alias.
You’ll need to be a Front administrator to add the alias address as a shared inbox.
Helpful information before you get started
If no one needs to reply using the email alias address, you do not need to add the alias to Front. You only need to have the primary Gmail account added to Front.
If only a single person should be able to send using the alias address, you’ll want to add the alias address to that person's individual inbox.
If a group of people should be able to send using the alias address, you’ll want to add the alias address to a shared inbox.
Front recommends you convert your alias into a Google Group. Google Groups are free to create and will make it easier for you to manage emails sent to your current alias address. Check out more information about Google Groups here.
Security and deliverability considerations
If you need to send emails using the alias address you've connected to Front, we strongly recommend you either set up SPF/DKIM on your DNS OR set up a custom SMTP through Google's Gmail SMTP Relay.
Utilizing Google's Gmail SMTP Relay will allow you to deliver emails through your existing email infrastructure, maintaining your current level of email deliverability.
Setting up SPF/DKIM will ensure emails sent through Front's 3rd party email provider - SendGrid - have proper authorization to send on your domain's behalf, protecting your emails from landing in your recipient's spam folder.
Instructions
Step 1
Click the gear icon on the top right of Front and select company, workspace, or personal settings in the left sidebar, depending on the space you’re working with. Admins can also access user settings by following these steps.
Step 2
Click on Inboxes on the left menu and create a new shared inbox or individual inbox.
Step 3
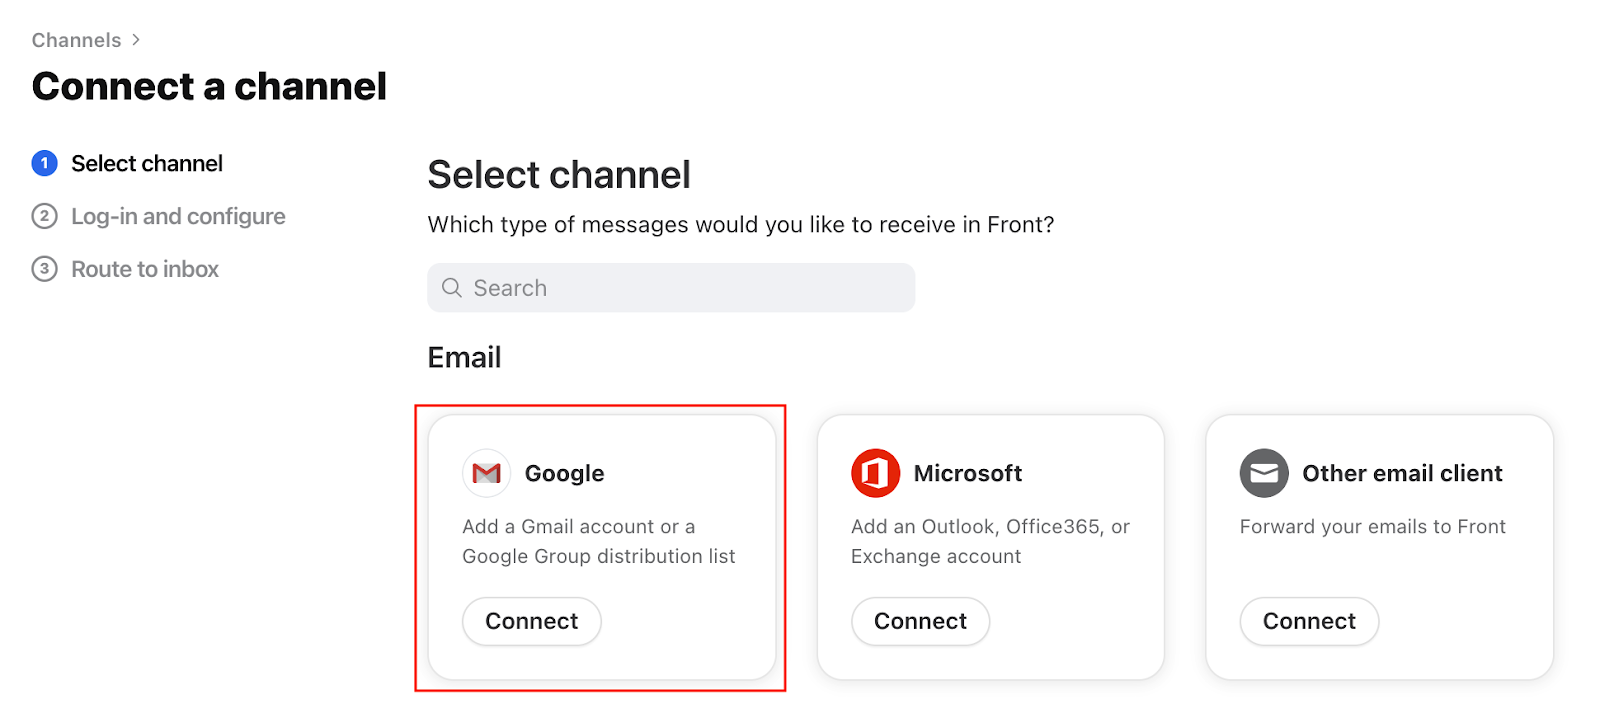
Click Channels on the left menu, then click the Connect a channel button.
Step 4
Choose Google from the channel menu, then select Gmail Alias. Click Continue.
Step 5
Enter the email address and click Continue.
Step 6
Select the inbox to connect to your channel, then click Save changes. All messages from your channel will route to this inbox by default.
Step 7
Navigate back to Front and click Send email to validate the forwarding is set up correctly. Click the link in the email to validate and be able to send from this address in Front, then click Continue and finish the setup steps.
FAQ
Will emails sent through Gmail's SMTP Relay appear from the alias address or the primary Gmail account address?
Emails will appear From: the alias address. For example, let's say I have a primary Gmail account (andersen@) and an alias (andersen.yu@). Despite having to set up the custom SMTP using the andersen@ credential, when I send an email from Front using andersen.yu@ the recipient will receive an email From: andersen.yu@. Read more about setting up a Gmail SMTP Relay here.
How can I prevent duplicate conversations from appearing in both the alias channel and the primary channel?
It is expected that messages sent to your alias will also be routed to your primary channel in Front. If you would like to keep these inboxes separate, we would recommend converting your alias to a Google Group. Google Groups are free to create and will make it easier to manage routing emails to go only to your alias addresses. Please find more information on adding a Google Group here.
Pricing
This feature is available on all plans.