
Overview
Workspaces are a way to divide up your inboxes into separate spaces with their own workflows, analytics and resources such as tags or message templates. Teammates can be given access to one or more workspaces with different roles.
If you’re unsure whether or not your team should use workspaces, check out this article about when to use workspaces.
You must have Front company admin permissions to create and manage workspaces.
Create a workspace
Step 1
Click the gear icon on the top right of Front and into the Company settings tab, and select Workspaces.
Step 2
Click Add a workspace.
Step 3
Give your workspace a name and select your desired settings.
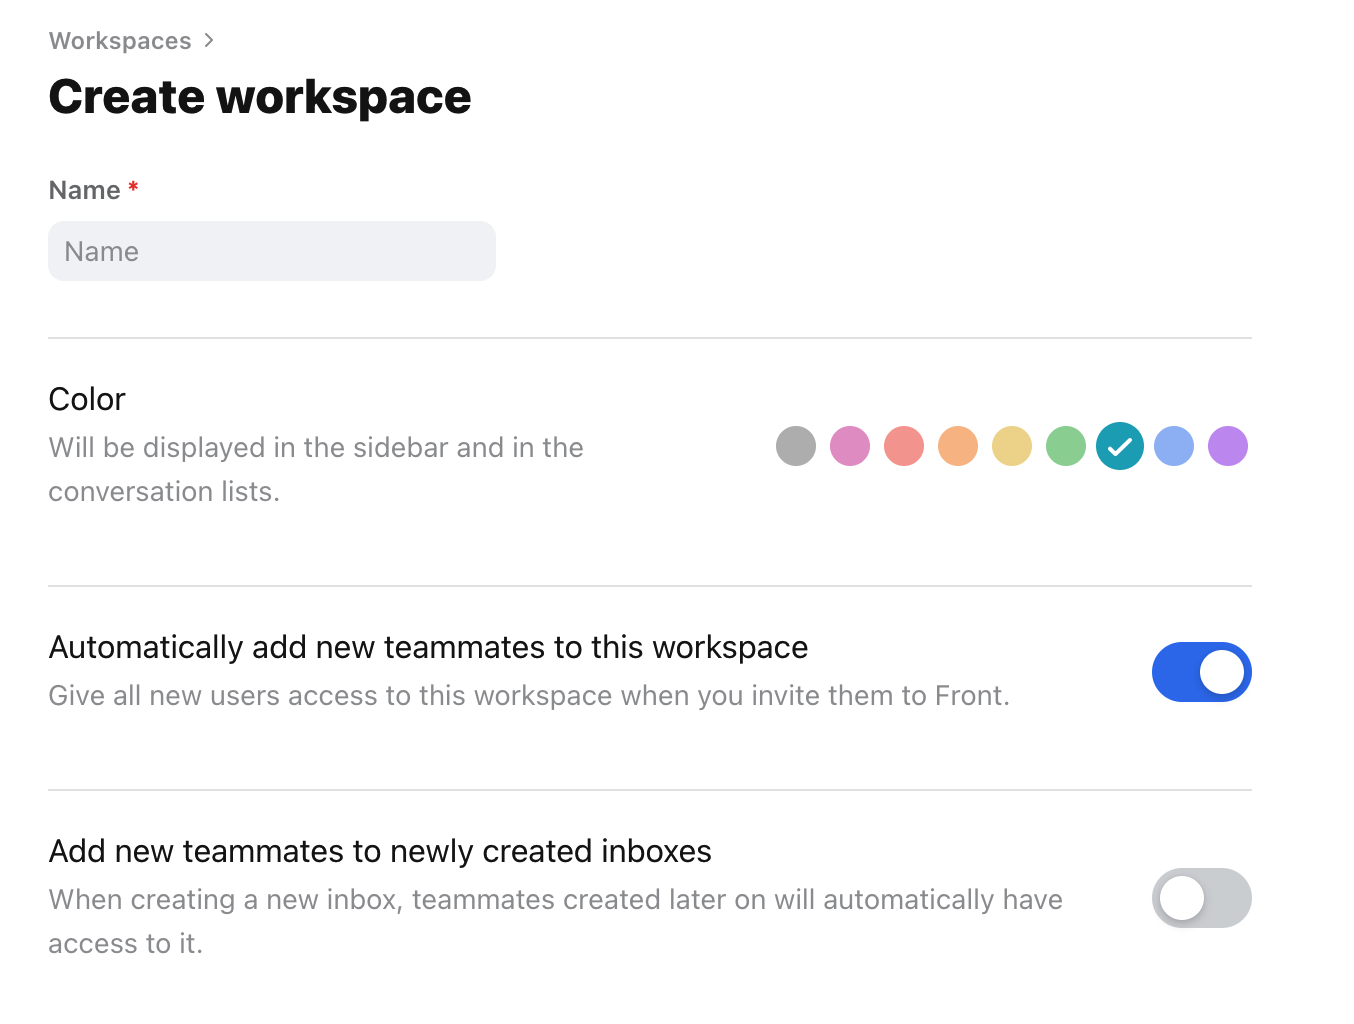
Step 4
Click Save. The company admin who created the workspace will automatically be added to it.
Note: There is a limit of 10 workspaces per account. If you need more, please contact us.
Add teammates to a workspace
There are two ways to add teammates to a workspace, each described below.
Via the API
You can use the API to manage teammates and their workspaces programmatically. API documentation is available here (use the Teams endpoints).
Via the Teammates menu in Front
Step 1
Click the gear icon on the top right of Front and into the Company settings tab, and select Teammates.
Step 2
Click the name of an existing teammate you’d like to add to the workspace. Check out this article if you’d like to invite brand new teammates to Front.
Step 3
Click the Workspaces and shared inboxes tab. If you have one workspace, you'll see the tab as Shared inboxes.
Step 4
In the Workspace role dropdown, select the type of access this teammate should have in the workspace. In the inbox list, toggle on inboxes this teammate should have access to.
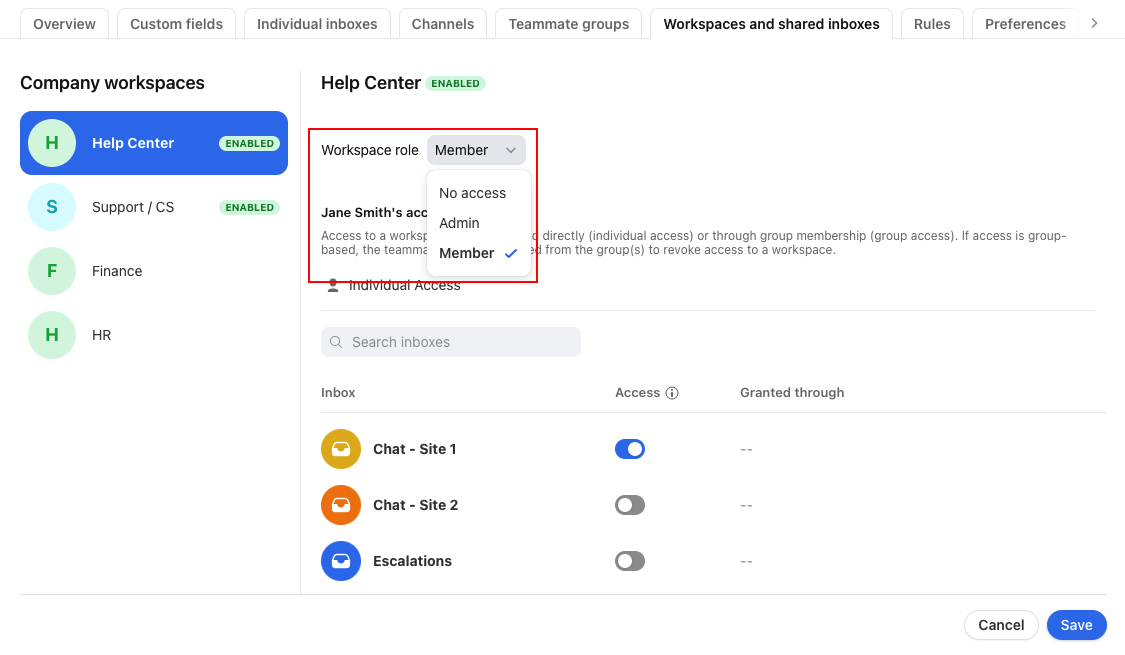
Step 5
Click Save.
Pricing
This feature is available on the Scale plan or above. Some legacy plans may also have this feature.