
Overview
Message templates are your saved responses to common questions. They allow you to respond faster to inbound messages, lessen the repetitive nature of replying to frequently asked questions, and for your team to have a unified voice in what you tell your customers.
Front allows you to create individual and shared message templates. Individual message templates are visible to only you, and shared message templates can be visible to your teammates on the inbox level. Both admins and regular members can create message templates.
Create a message template
From the composer
Step 1
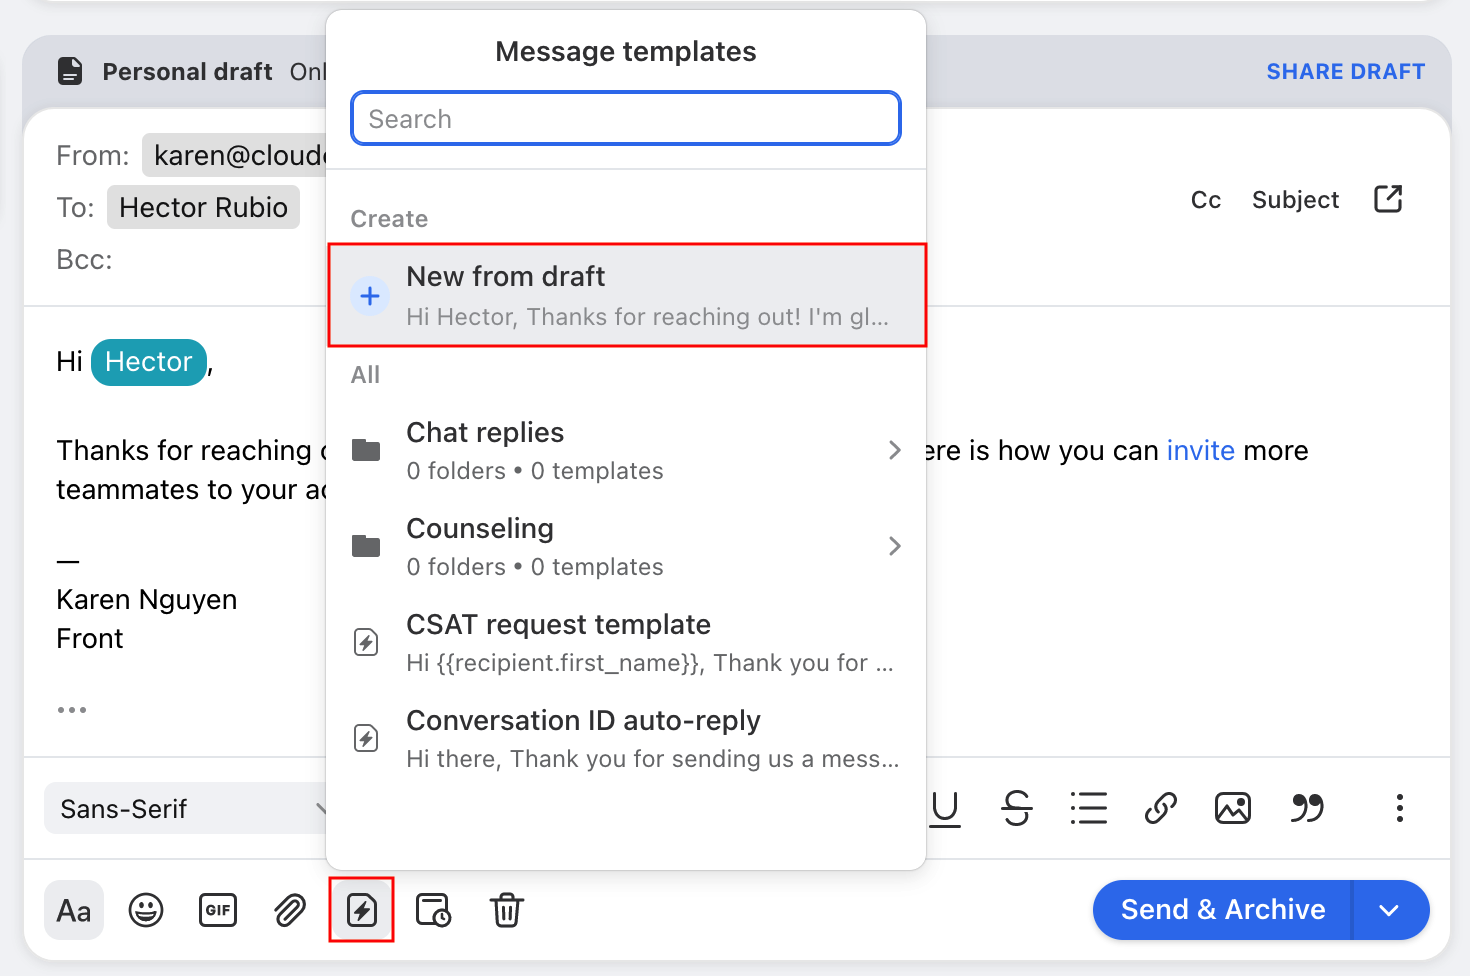
In your composer, draft up your message, including any dynamic variables, that you want to save as a message template.
Step 2
Click the message template icon in the composer toolbar to open the message template menu. Select New from draft.
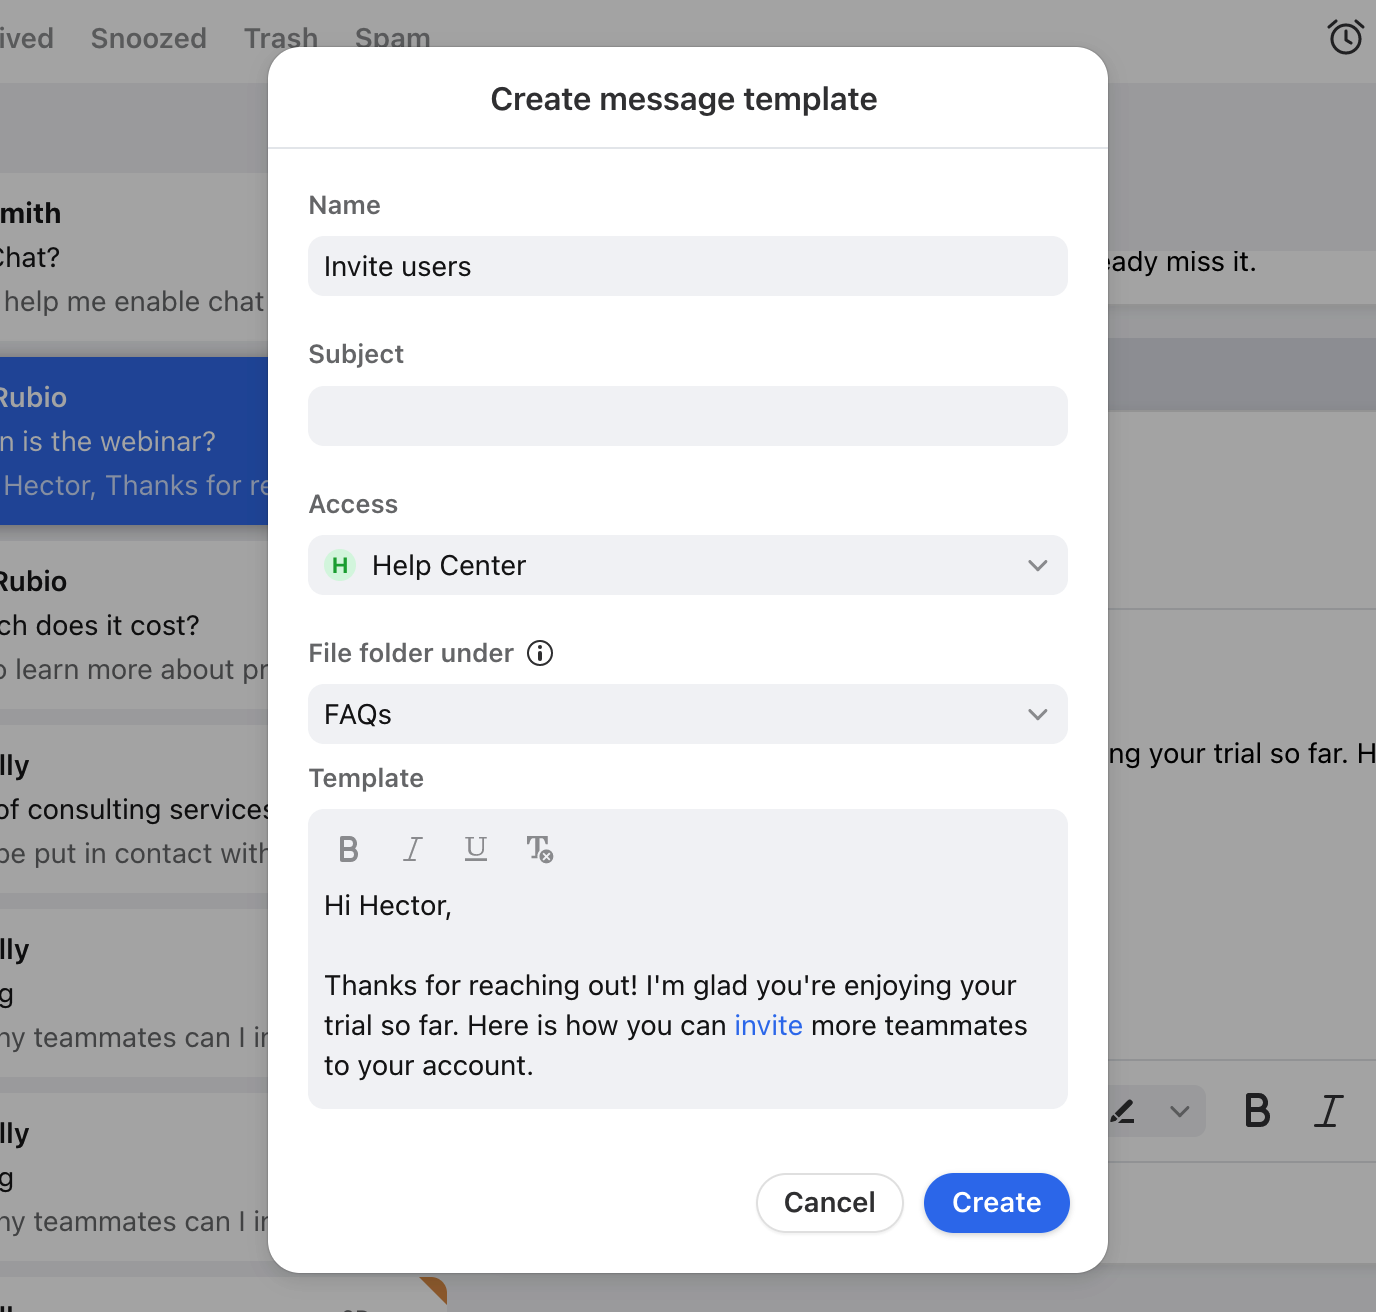
Step 3
You will see a pop-up box to save the message template. Enter the name, choose whether you want to save it as a private or shared template, pick a folder to nest it under if needed, and make any last edits. Then click Create. This message template will now be available for future use.
Step 4
You can edit your message templates at any time in your settings following the steps here, including specifying which inboxes the message template should be available to.
From Settings
Step 1
Click the gear icon on the top right of Front and into the Company or Personal settings tab, depending on which space you are working with, and select Message templates.
For companies with multiple workspaces, shared message templates are set up per workspace.
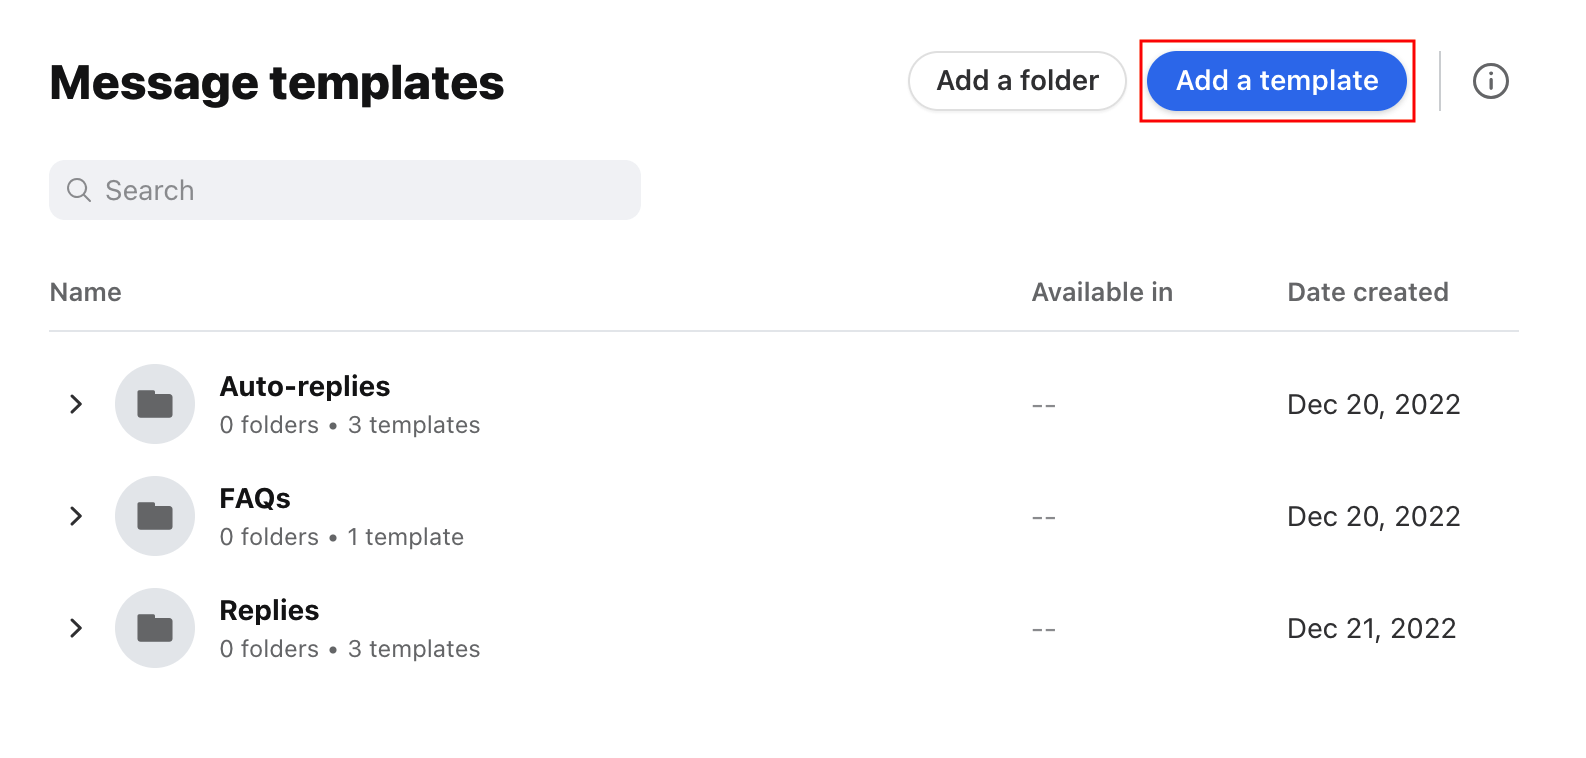
Step 2
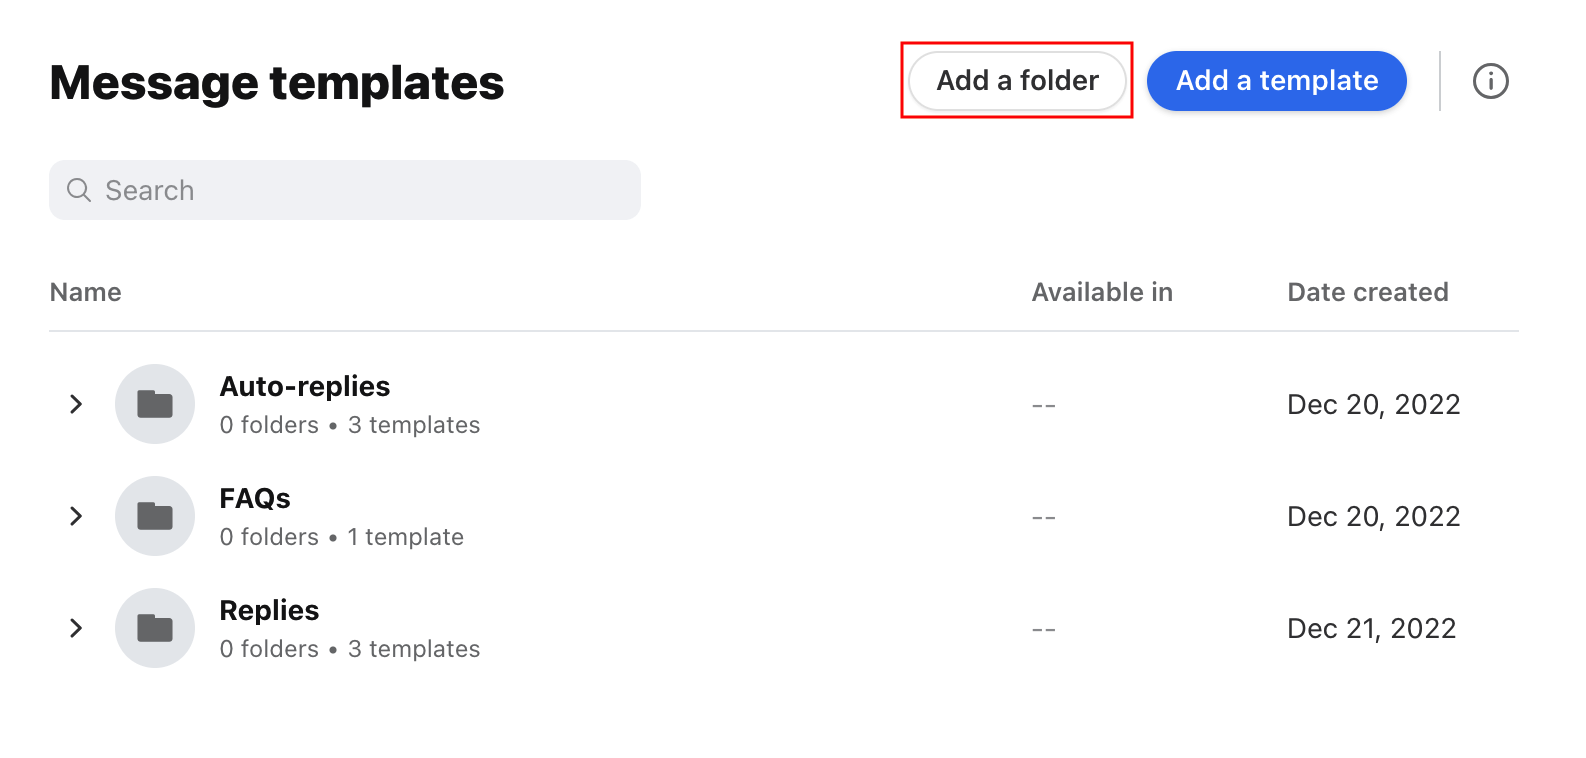
Click the Add a template button.
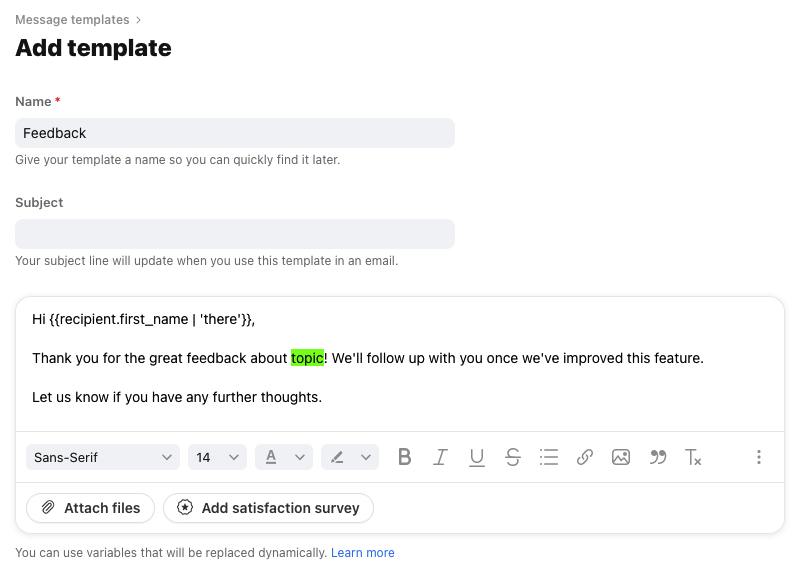
Step 3
Write your message template, including any variables if needed. If you add a subject, the subject will update when you use the message template and override the previous subject.
Tip: highlight the text that should be edited or personalized before you send the message template, so that the text stands out.
Step 4 (optional)
In the File template under setting, select the message template folder this template should be added to.
Step 5
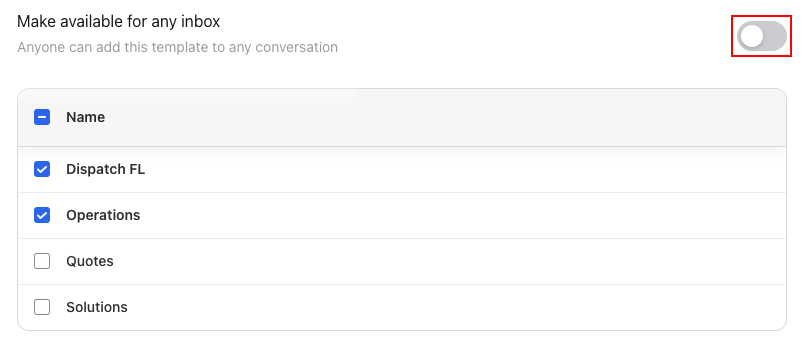
In the Make available for any inbox setting, select the inboxes that should have access to the template when replying in the composer. To grant access to all inboxes in the team, toggle the setting on.
Step 6
Click Create.
Message template availability
To learn how to make message templates available to specific inboxes, see this article.
Organize with folders
You may already have or plan to create dozens of message templates, so it's helpful to use folders to enable yourself and your team to find and use message templates quickly. You can nest up to 5 layers of folders.
Step 1
Click the gear icon on the top right of Front and into the Company or Personal settings tab, depending on which space you are working with, and open the Message templates section.
Step 2
Click on the Add a folder button at the top to create a new folder. To nest this folder under other existing folders, select the folder in the File folder under setting.
Step 3
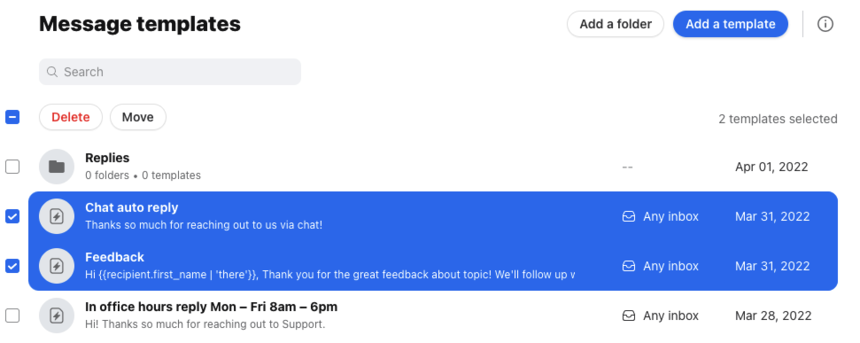
To move message templates into your folders, hover on the message template and you will see a checkbox appear to its left. Check off the templates that you'd like to move into a folder. You can also check the box to the left of the Delete button to select all.
Step 4
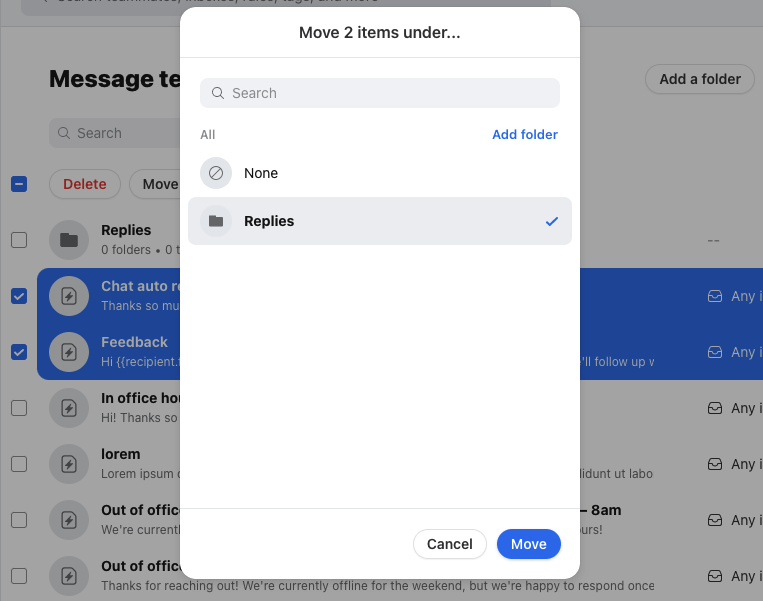
Click the Move button at the top and you will see a menu to select which folder to move the message templates into. Choose the folder and click Move.
Step 5
Now, you will see the folders in the Message templates menu when you insert a message template. You can also search for the name of a folder to quickly pull it up and browse through its contents before inserting the correct message template.
Use a message template
Via the composer icon
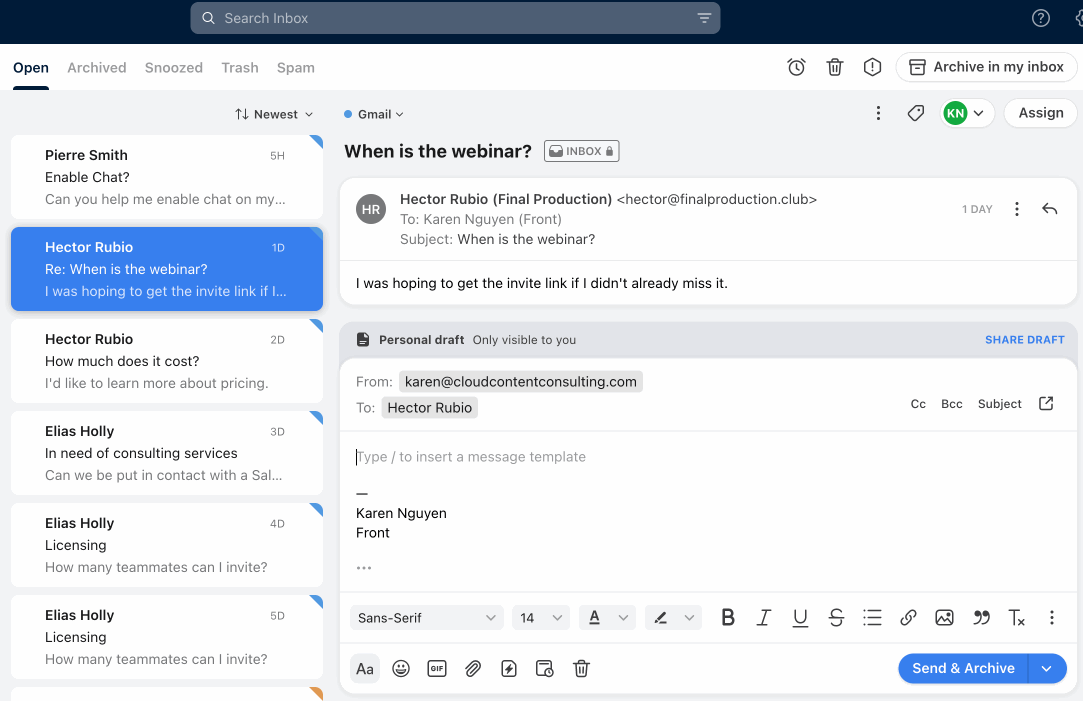
Step 1
To insert a message template you've created, click the message templates icon in the composer toolbar to open the message templates menu. You can type keywords to search for a message template or scroll through the list, then hover on one to see a preview of it.
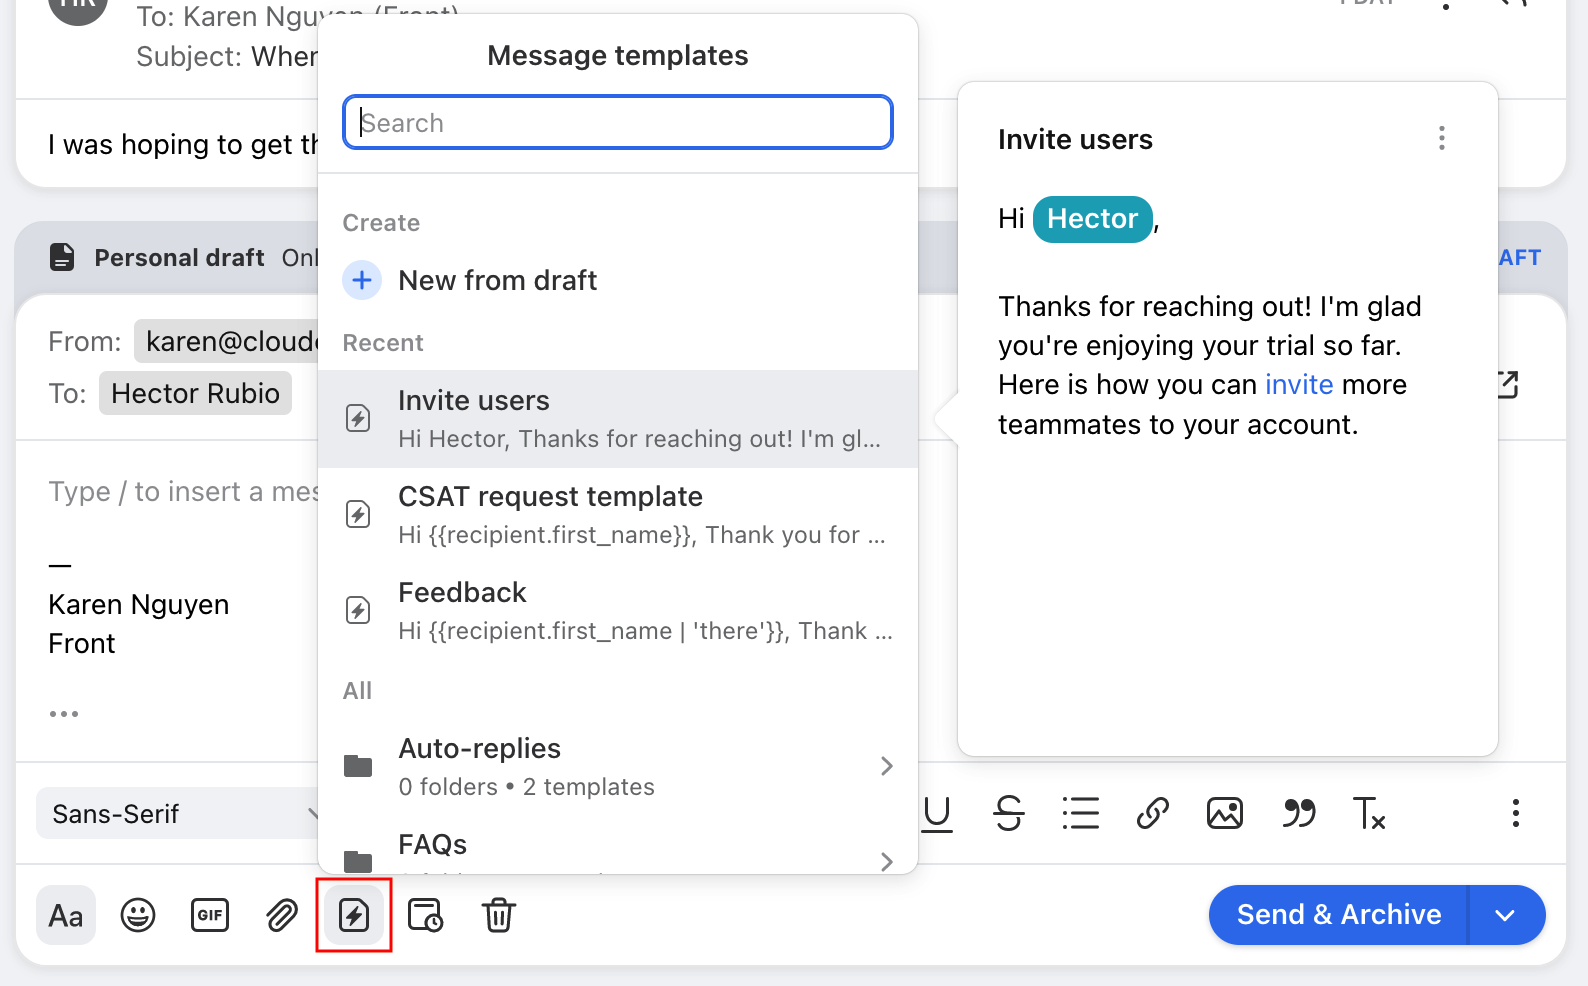
Step 2
Click the message templates to insert it, then make edits as you wish before sending.
Via quick insert
You can also quickly find and insert a message template into your message without leaving your keyboard. Type /template or a forward slash in your composer, type the name of your message template, then press Enter to insert it.
Edit a message template
You can also edit message templates from both the composer and the Settings menu similar to above. For step-by-step instructions, see here.
Message template analytics
Message Templates report
The Message Templates report allows you to gauge how often your team is using message templates, and narrow in on template-specific metrics. For more information about the Message Templates report, check out this article.
Note that the Message Templates report only includes messages sent by teammates; message templates sent by auto-replies or sequences are excluded.
Track automated message templates
If you'd like to track how often a message template is being sent out by an auto-reply rule, you can do so by adding a rule to automatically tag the conversations where you've sent the message template.
You can create a rule triggered by an outbound message, if the body of the outbound message contains a unique snippet from your message templates, then add the tag to track this message templates. You can then run analytics reports on the tag to see how often the templates are being used. Use this workflow for each of the message templates you want to track.
Pricing
This feature is available on all plans.