
Overview
Scheduling meetings over email typically involves a number of back and forth emails to find a time that works. With Front Calendar, you can insert your availability directly from the composer and allow the recipient to book a meeting with you with a tap.
Instructions
For ad-hoc, one-time meetings
Step 1
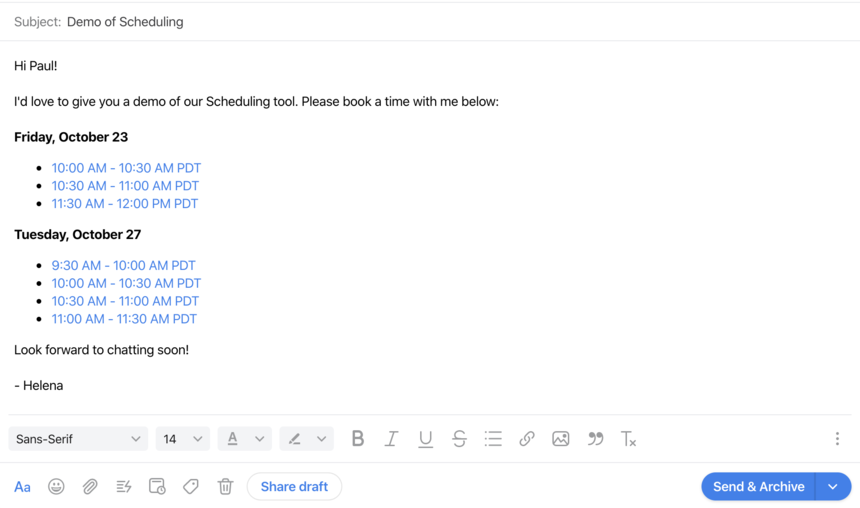
From the email composer, click the Scheduling icon and then Insert meeting times.

Step 2
From the calendar popup, simply click and drag regions of the calendar that you want to share as potential meeting times. Front will automatically split up availability selections into time slots for your recipient to choose from. For example if you choose 12pm to 1pm and keep the duration setting at 30 minutes, Front will generate time slots from 12pm-12:30pm and 12:30pm-1pm.

Step 3
Use the Meeting settings section to optionally customize the details of the meeting you’re scheduling; such as the meeting title, duration, videoconferencing, and more.
You can use the Add additional guests setting to also include a teammate in this meeting.
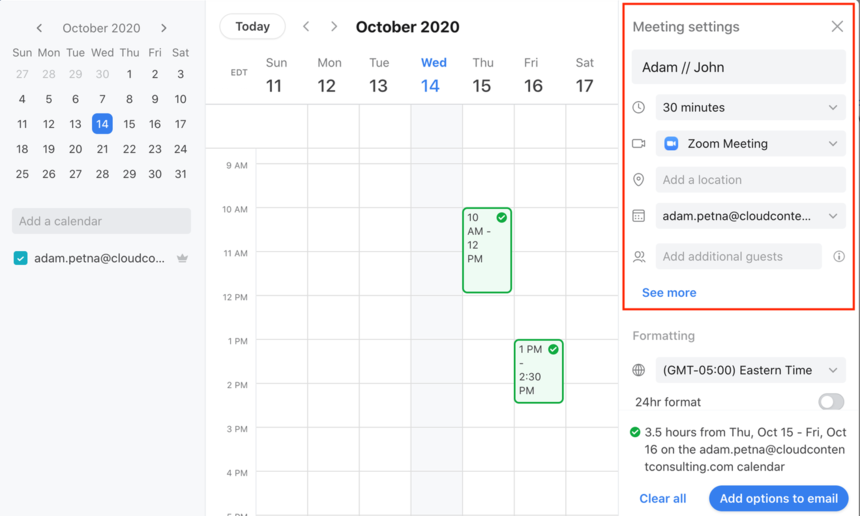
You can also use the Formatting settings to customize the timezone and 24hr formatting of the time slots that are inserted into the email.
Step 4
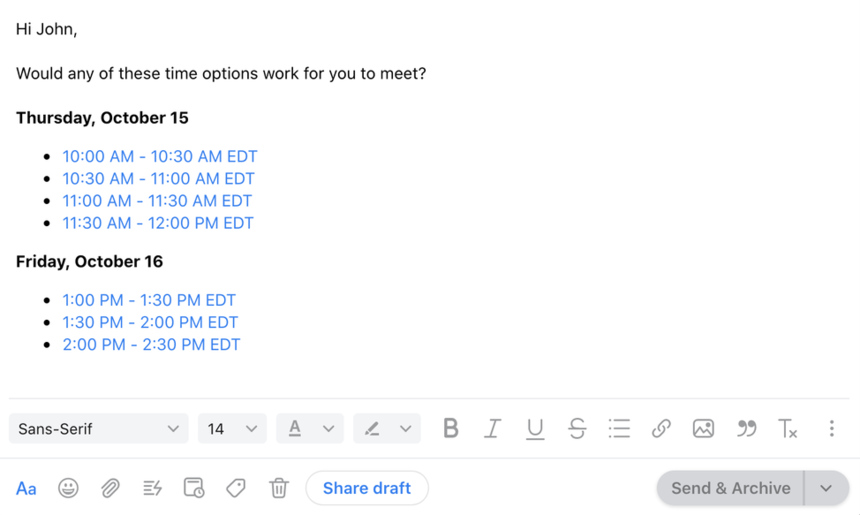
Click the blue Add options to email button to insert the meeting times directly into your email. When the recipient receives your email and taps one of the available meeting slots, they’ll be able to book a meeting with you instantly. After they’ve done so, an email and calendar invite will be sent to all attendees.
Insert from existing scheduling links
Step 1
You can insert scheduling links you’ve set up directly into your email without needing to leave the composer. Click on the Scheduling icon in the composer bar and on View scheduling links.

Step 2
You will see a list of your existing scheduling links that you can insert, or even create a brand new scheduling link from this menu. If you want to change an existing link before you send it, you can click the three dots to the right of the link and click Edit. You’ll find more details about Scheduling Link settings here.
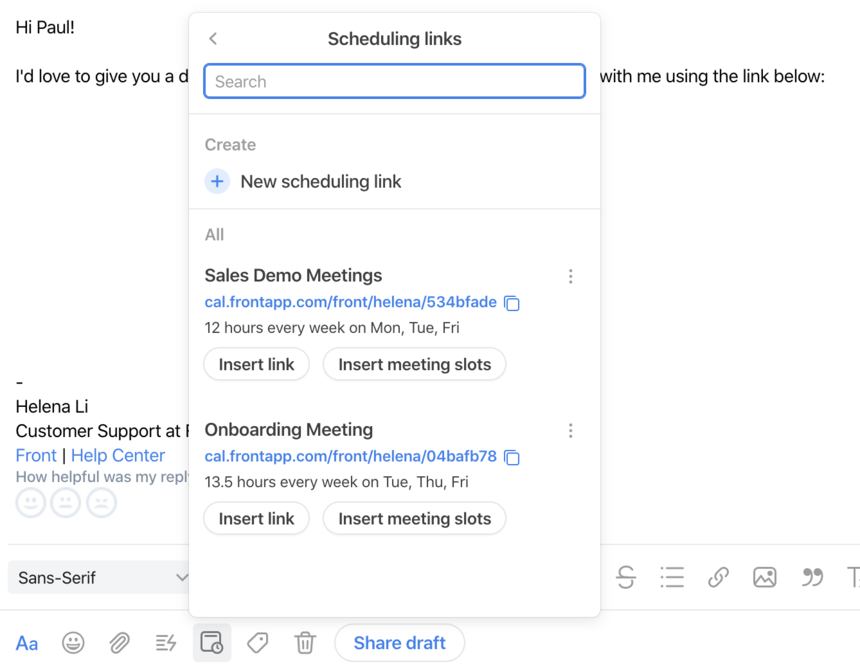
Step 3
To insert the meeting information into your email, have two options:
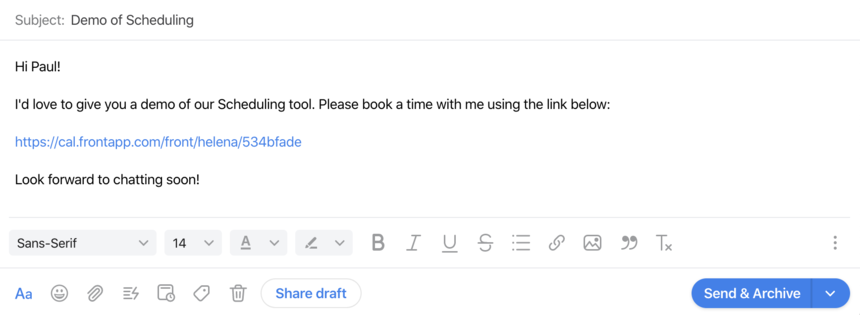
Insert link: This inserts the link you see into the email, and your recipient can click the link to open a web page to view your availability and book a time.
Insert meeting slots: This inserts the individual time slots of the scheduling link directly into the email and your recipient can click one of them to book directly without first needing to open a new page. You can also manually delete any slots from the email before you send it.
FAQ
How do I stop the Prevent double-booking feature?
There may be times when you do want to schedule over an existing event or Busy hold. In these cases, here's how you can schedule over existing events:
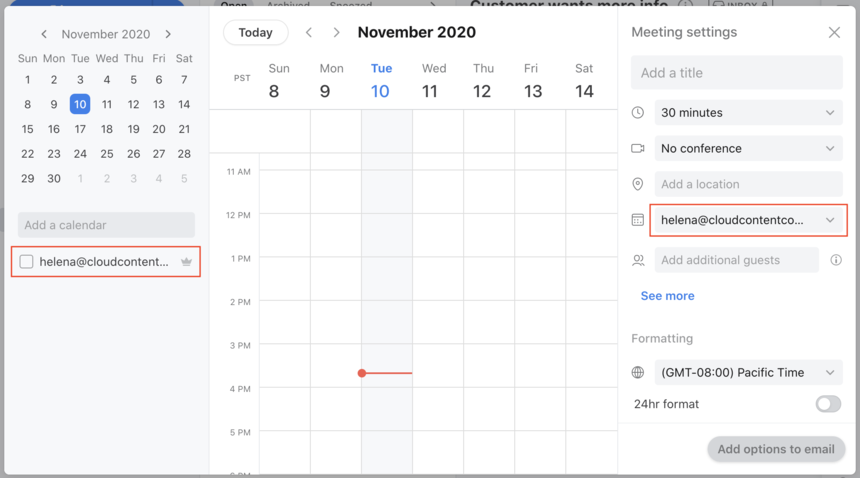
Insert meeting times: Unselect the calendar to view, and ensure that you have this calendar selected in the event details.
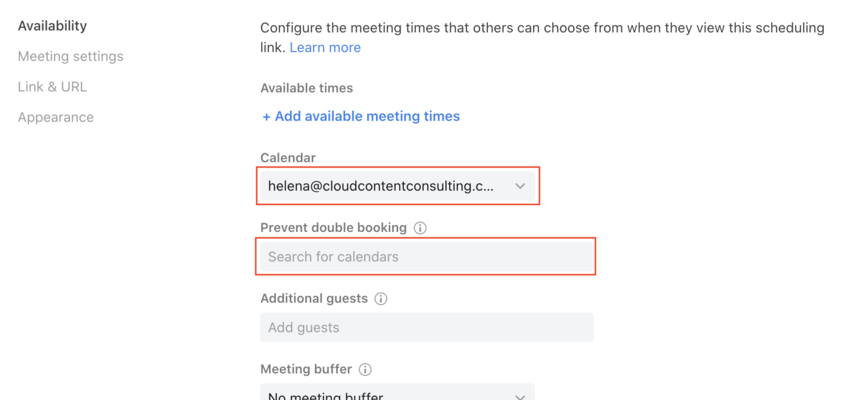
Scheduling links: Ensure you have your desired calendar that you want to book on selected, and remove your calendar name under the Prevent double booking section so that it does not appear.
Can I set a default conferencing option?
You can set a default video conferencing option in your personal preferences. You can always edit the option when creating the actual event.
Can participants reschedule?
If your participant needs to reschedule, they'll see an instant rescheduling link in the calendar invite. Check out this article to learn more.