
Overview
The following steps go over how to set up forwarding in Outlook. If you would like to link your Office 365 account to Front and take advantage of two-way sync, please follow the steps to add an Exchange Online Shared Mailbox, or add an Exchange Online User Mailbox.
Instructions
Part 1: Copy your forwarding address from Front
Step 1
Click the gear icon on the top right of Front and select company, workspace, or personal settings in the left sidebar, depending on the space you’re working with.
Step 2
Go to Channels, and select the channel you'd like to redirect your emails to.
Step 3
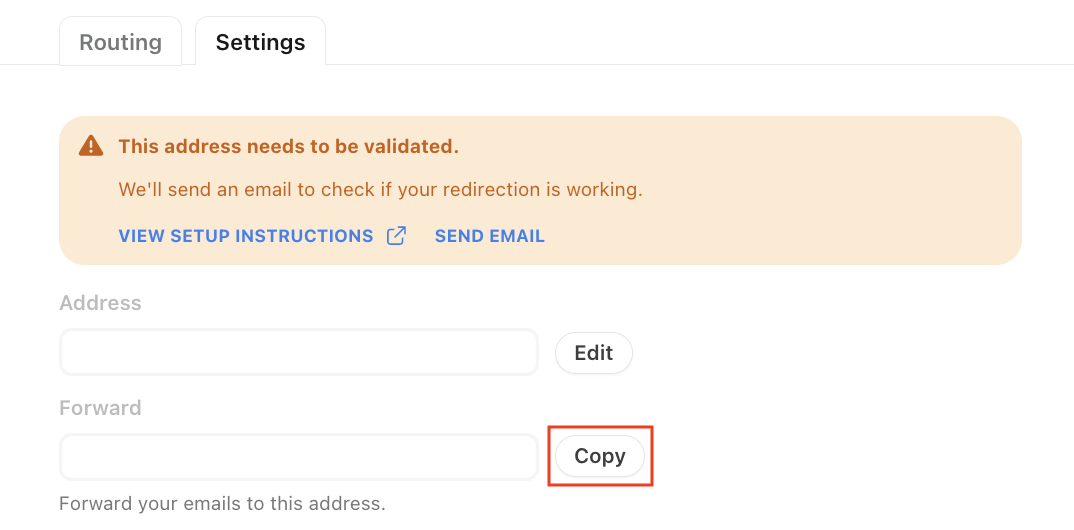
Click the Settings tab.
Step 4
Copy the address in the Forward field.
Part 2: Set up redirection for your shared inbox in Outlook.com
Step 5
Log in to your Outlook.com account. To set up redirection for a shared inbox, you'll need to have admin access to the account.
Step 6
Click Contacts, and Add a contact.
Step 7
Paste your Front forwarding address into the email field, and click Add.
Step 8
Now, go back into your menu, and select Mail.
Step 9
Click the arrow to expand the General options, and choose Distribution groups.
Step 10
Add the new contact you just created as a member of your group.
Step 11
You'll also want to change your delivery management preferences so that senders inside and outside of your organization can send messages to this inbox.
Step 12
To make sure everything is set up properly, click on Send email in Front channel settings. This will validate that the redirect is working correctly.