
Overview
Gainsight is the #1-Rated Customer Success Solution. It helps Customer Success teams turn their customers into their best growth engine, by increasing adoption, retention, and advocacy.
Front's Gainsight integration aims to make the day-to-day operations of a Customer Success team more impactful, through a combination of: facilitated access to customer information, automated routing of conversation, and intelligent escalation of communication.
You must have Front company admin permissions to set up the integration.
Instructions
Step 1
Click the gear icon on the top right of Front and into the Company settings tab, and select App store from the left menu.
Step 2
Select Gainsight from the list of integrations. Click See details, then click Enable app.
Step 3
Click Start using this app to navigate to the plugin in your app switcher.
Step 4
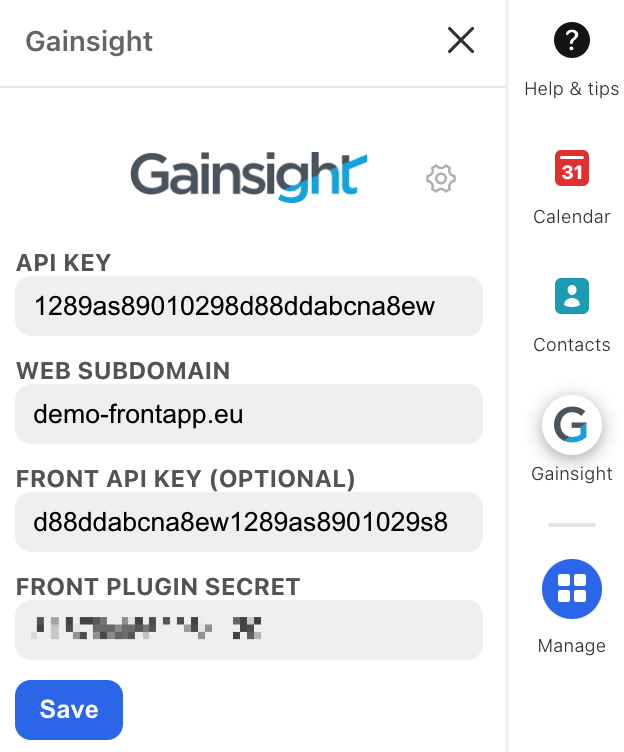
You'll be asked to provide the following information:
API key: Enter your Gainsight API key
Web subdomain: Enter your Gainsight web subdomain, which is the portion of the URL that comes after
https://and before.gainsightcloud.com/when you connect to Gainsight. Example-https://[YOUR-SUBDOMAIN-IS-HERE].gainsightcloud.com/Front API key: If want to enable the tagging and routing capabilities of the integration, enter a Front API key
The Front plugin secret is automatically populated.
Step 5
Click Save. You're all set to begin using the Gainsight integration!
How it works
Contextual plugin
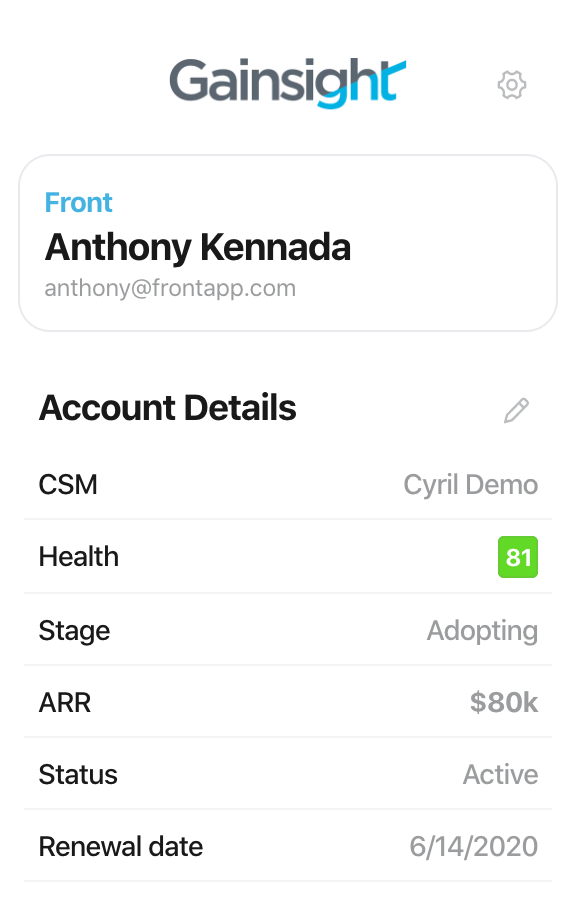
To minimize context switching and improve customer experience, the contextual plugin will use the sender's email address from the current conversation to retrieve relevant information available in Gainsight.
For instance, if john.smith@acmecorp.com is writing to you in Front, the plugin will display information tied to the Person with email john.smith@acmecorp.com in Gainsight. Any field that is tied to the Person or the Company linked to the email address can be displayed in the plugin.
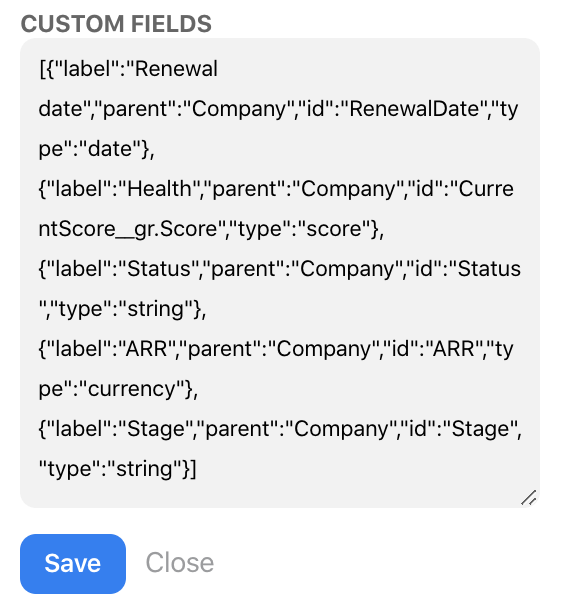
To make more fields available, navigate to the plugin's Settings and edit the Custom Fields input. You must provide a valid JSON array composed of objects with the following structure:
{ "label": "FIELD_LABEL", "id": "FIELD_ID", "parent": "FIELD_PARENT", "type": "FIELD_TYPE" }
The
labelshould be a human-readable string that will be displayed to users in the plugin along with the field's value.The
idshould be the Gainsight ID of the custom field.The
parentshould be one of "Person" or "Company", depending on whether the field is tied to a Person object or a Company object in Gainsight.The
typeshould be one of "date", "currency", "score", or "string".
By default, all the available fields will be displayed to new users of the plugin. However, each user is free to hide, display and re-order the available fields to tailor the interface to their specific needs.
Conversation tagger
To easily surface important conversations, a tag can be automatically applied to all inbound conversations coming from accounts under a certain Score threshold.
To set the threshold and tag, navigate to the Settings in the plugin, adjust the "Score threshold" and "Score alert tag" fields, and save. The CurrentScore__gr.Score Company field in Gainsight will be evaluated, and if it is strictly inferior to the set threshold, the tag will be applied.
Conversation router
If your customers are reaching out to you using a channel that isn't directly linked to an individual team member (like a shared inbox or a live web chat), you might find it useful to automatically assign the conversation to the owner of the account. That way, instead of the conversation sitting unattended in the queue, it is immediately triaged to most relevant team member.
How it works: upon reception of a new message, if the conversation is unassigned and the sender can be associated to an owner in Gainsight (using the CSM Company field) and this owner is also a Front user, then the conversation will be automatically assigned to them.
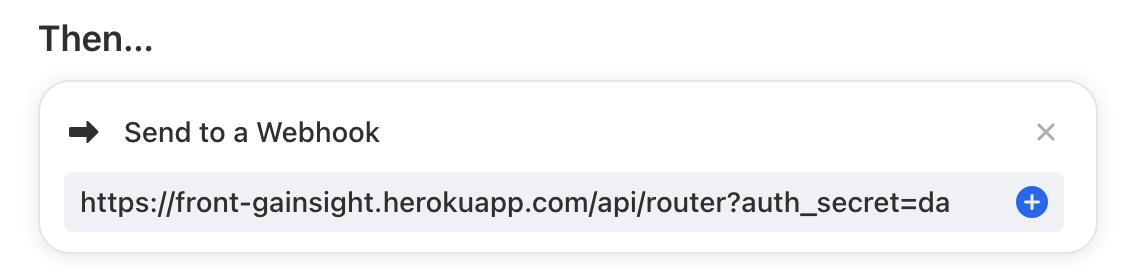
To enable the tagger and router features, you will also have to setup a webhook rule in Front. Open your Settings, navigate to Rules, and create a new rule triggered on inbound messages that will then "Send to a webhook". The webhook endpoint should be https://front-gainsight.herokuapp.com/api/router?auth_secret=[YOUR_PLUGIN_SECRET]. Your plugin secret can be found in Gainsight plugin in the app switcher.
Pricing
This feature is available on the Growth plan or above. Some legacy plans with different names may also have this feature.